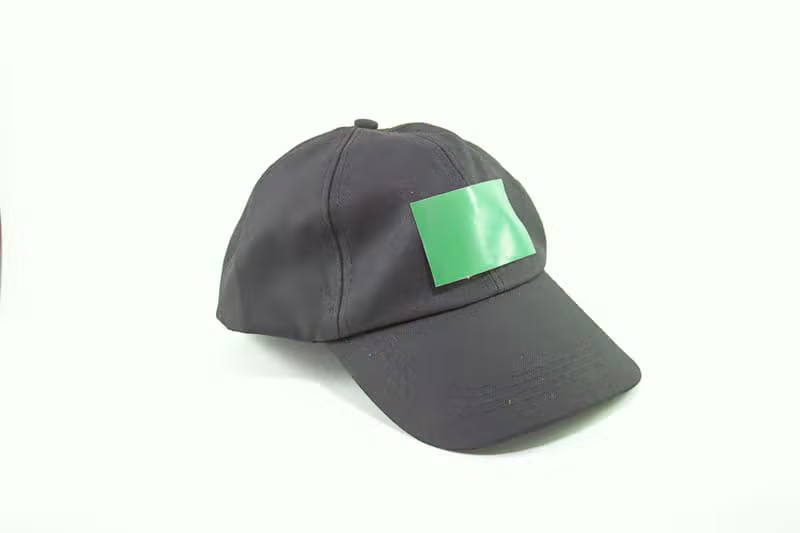
Top 10 Cap Branding Methods, Embroidery, Patches, and Prints Compared
Caps are one of the most wearable branded textile gifts because they are size flexible, highly visible, and useful year round. For promotions, a well made cap can deliver thousands of impressions at events, on commutes, and in everyday photos. For retail brands, caps sit at the intersection of function and identity, they can carry a logo, a slogan, a badge style emblem, or a seasonal graphic without demanding the commitment of a full outfit.
But not all decoration techniques perform the same. The “best” method depends on the fabric, the cap construction, the logo complexity, the desired retail feel, and the budget. Apron Bag Caps | Branded Textile Gifts for Promotions & Retail Brands often sees the same core question from buyers, “Should I embroider, add a patch, or print?” The answer is usually a comparison of durability, detail, lead time, and the kind of brand signal you want to send.
This guide compares the top 10 cap branding methods. Each point explains what the method is, when it shines, what to watch out for, and how it compares to embroidery, patches, and prints. Use it as a practical checklist before you approve samples.
Quick decision lens before you choose a method
- Brand vibe: heritage and premium often map to embroidery and leather, streetwear often maps to bold patches and 3D effects, high detail art often maps to digital transfers.
- Logo complexity: small text and gradients are easier with prints or woven patches than with standard embroidery.
- Cap type: structured 6 panel, unstructured dad cap, trucker mesh, 5 panel camper, visor, beanie, each behaves differently under needles and heat.
- Wear and wash: long term daily use favors embroidery and durable patches, while some prints prioritize color detail over abrasion resistance.
- Budget and quantity: setups, molds, and digitizing can shift the best choice depending on order size.
1) Flat embroidery (standard embroidery)
Flat embroidery is the most widely recognized cap branding method. Thread is stitched directly into the fabric, creating a textured, dimensional mark that reads as durable and premium. On caps, flat embroidery is commonly used for front center logos, side hits, back arches, and small icons above the closure.
Why it works
- Premium perception: stitched logos feel established and giftable, especially for corporate uniforms, clubs, and retail basics.
- Excellent durability: thread holds up well to abrasion and repeated wear.
- Good coverage: medium sized logos with solid shapes look clean and bold.
- Color stability: thread colors remain consistent, with less fading than many inks.
Watch outs
- Fine detail limits: very small text, thin lines, or tiny negative spaces can fill in due to thread width and stitch pull.
- Gradients and photo detail: not ideal unless translated into simplified stitch patterns.
- Panel seams and structure: front center embroidery may cross a seam on 6 panel caps, which can distort details or require seam friendly artwork placement.
- Hand feel inside: embroidery backing can add stiffness. A well finished sweatband helps comfort.
Best uses
- Corporate gifting where longevity matters more than ultra fine detail.
- Retail caps with a classic logo mark or monogram.
- Sports teams, clubs, staff uniforms, and event merch that needs to last.
Comparison summary
- Compared to printing, flat embroidery is more durable and premium, but less detailed for tiny text and gradients.
- Compared to woven patches, it is more tactile, but often less sharp for micro lettering.
- Compared to leather patches, it supports more colors without extra processes.
2) 3D puff embroidery
3D puff embroidery uses foam under the stitching to create raised, sculpted letters or shapes. It is popular on streetwear, sports headwear, and bold branding where the logo must read from a distance. This method typically works best with thicker strokes and simpler shapes.
Why it works
- High impact: the raised look makes a logo visually louder without needing bright colors.
- Retail energy: it is strongly associated with premium caps and limited drops.
- Great for initials: block letters, varsity styles, and short words look strong.
Watch outs
- Not for tiny detail: fine lines can break or look uneven over foam.
- Foam wear over time: high friction areas can flatten slightly, depending on stitch density and use.
- More thickness: it can feel bulky if overused or placed where caps flex heavily.
Best uses
- Front center statements on structured caps.
- Sports and streetwear collaborations.
- Merch where bold readability is a priority.
Comparison summary
- Compared to flat embroidery, it is bolder and more dimensional, but less suited to intricate artwork.
- Compared to patches, it integrates directly into the cap and looks less like an add on component.
3) Woven patches (stitched on)
Woven patches are created on a loom rather than stitched line by line like embroidery. The result is a flatter surface with very crisp detail, especially for small text and thin outlines. The patch is then stitched onto the cap, usually with a border stitch that frames the design.
Why it works
- Sharper detail: small letters and fine patterns stay readable.
- Clean edges: the patch border provides a neat, intentional look.
- Design flexibility: you can use complex line art without the bulk of dense embroidery.
- Consistent results: woven production can be very repeatable across runs.
Watch outs
- Patch feel: patches add a layer. Some buyers prefer direct embroidery for a more integrated look.
- Stitching placement: patch attachment must be clean to avoid puckering on curved cap fronts.
- Edges and fray control: choose a merrowed border or heat cut edge suited to your design.
Best uses
- Caps with lots of small text, coordinates, badges, or intricate symbols.
- Promotional hats where consistent legibility matters, such as tours, festivals, and brand activations.
- Retail caps styled as badge or label driven products.
Comparison summary
- Compared to embroidery, woven patches deliver sharper micro detail and flatter comfort on the patch face.
- Compared to prints, woven patches feel more premium and less susceptible to surface scratching.
4) Embroidered patches (stitched on)
Embroidered patches are traditional patches made with embroidery thread on a backing, then applied to the cap by stitching. They have more texture than woven patches and can signal heritage, outdoors, workwear, or club identity. Think of classic scout style or badge style marks.
Why it works
- Textured, tactile look: the patch becomes a feature, not just a logo.
- Great for badge shapes: shields, circles, rectangles, and custom outlines.
- Brand storytelling: patches pair well with “established” dates, slogans, and location details.
Watch outs
- Detail limits: fine lines and tiny text can still be challenging compared to woven patches.
- Bulk: heavier thread plus patch backing can feel thick on low profile caps.
- Color blocks: large fill areas can look raised and may show stitch direction, which is not a flaw but a style.
Best uses
- Outdoor brands, breweries, motorcycle clubs, heritage inspired retail.
- Premium promo gifts where a badge look feels collectible.
Comparison summary
- Compared to woven patches, embroidered patches are more textured but less crisp for micro lettering.
- Compared to direct embroidery, patches can reduce risk on difficult fabrics because you attach the patch rather than stitch dense designs into the cap panel.
5) Leather patches (genuine leather or PU leather)
Leather patches are a popular cap branding method for lifestyle, coffee, outdoor, and boutique retail brands. The patch can be engraved, debossed, stamped, or printed, then stitched onto the cap. Genuine leather develops character over time, while PU leather provides consistent color and lower cost.
Why it works
- Premium signal: leather reads as upscale and crafted, especially on cotton twill, canvas, or wool blend caps.
- Simple, bold branding: debossed or engraved marks look clean without relying on bright colors.
- Aging story: genuine leather can patina, which some retail customers love.
Watch outs
- Fine line limits: extremely thin lines may not deboss cleanly, depending on leather thickness and tooling.
- Color limits: you often get a tonal logo rather than multiple colors, unless you add printing.
- Care considerations: leather can react to moisture and sweat over time. Edge finishing matters.
- Ethical and compliance needs: confirm material sourcing, labeling, and any brand restrictions for animal products.
Best uses
- Retail caps where understated branding is preferred.
- Corporate gifts intended to feel less promotional and more lifestyle.
- Trucker caps with a front patch panel, a very common silhouette for leather patch branding.
Comparison summary
- Compared to embroidery, leather patches are more minimal and lifestyle oriented, but less colorful.
- Compared to PVC patches, leather is warmer and more natural, while PVC is more rugged and graphic.
6) PVC or rubber patches (soft PVC, silicone, TPU)
PVC patches are molded patches with raised and recessed areas, often filled with color. They deliver a bold, weather resistant look and are popular for tactical, outdoor, and performance aesthetics. Silicone or TPU patches can offer a softer feel and a more modern matte finish.
Why it works
- Highly durable: resistant to water, dirt, and scuffing in many use cases.
- Strong 3D effect: molded depth gives a technical, modern look.
- Color blocking: solid colors and thick outlines appear crisp and graphic.
Watch outs
- Mold setup: there is typically a tooling step, which can increase initial costs but pays off at higher quantities.
- Weight and stiffness: larger patches can feel heavy on lightweight caps.
- Small detail: very fine text may not mold well. Designs need simplified strokes.
- Heat sensitivity: some materials can deform at high heat, so care is needed during application and shipping.
Best uses
- Outdoor and performance promotions where weather resistance matters.
- Security, industrial, and tech brands that prefer a modern badge look.
- Limited color logos that need strong contrast and durability.
Comparison summary
- Compared to embroidered patches, PVC is more weather resistant and graphic, but less soft and less traditional.
- Compared to printing, PVC feels more engineered, but is not suited to photographic detail.
7) Chenille patches and felt applique
Chenille is the fuzzy, looped texture often seen on varsity jackets. On caps, chenille patches and felt applique create a bold retro statement. The patch is usually stitched on, sometimes combined with embroidery outlines for extra definition.
Why it works
- Distinct texture: it stands out immediately among standard embroidered caps.
- Retro and varsity appeal: perfect for collegiate themes and throwback drops.
- Large shapes: big letters, mascots, and simplified icons look powerful.
Watch outs
- Not for small logos: chenille needs scale to look intentional.
- Lint and snag risk: the texture can attract lint and can snag if abused, though quality chenille holds up well in normal wear.
- Limited detail: outlines can help, but photo level detail is not realistic.
Best uses
- Team merchandise, student groups, campus promotions.
- Retail capsule collections with retro storytelling.
- Big, readable monograms that become the product’s main feature.
Comparison summary
- Compared to 3D puff embroidery, chenille is softer and more nostalgic, but usually needs larger art.
- Compared to woven patches, it sacrifices detail for texture and character.
8) Screen printing (direct ink printing)
Screen printing applies ink through a stencil onto the cap panel. It is common for large runs, simple logos, and designs that do not need a stitched look. On caps, screen printing is often used on foam front trucker panels, cotton twill fronts, and sometimes on underbrims.
Why it works
- Cost effective at volume: once screens are set up, large quantities become economical.
- Lightweight feel: prints add minimal bulk compared to patches.
- Good color pop: solid inks can be very vibrant, especially on light panels.
Watch outs
- Detail and alignment: fine detail can be possible, but depends heavily on mesh count, ink choice, and cap curvature.
- Durability varies: cracking and fading depend on ink system, curing, and fabric stretch.
- Cap shape challenges: curved surfaces and seams can complicate clean prints. A dedicated cap printing setup helps.
- Limited gradients: halftones can work, but require expertise and may not match photographic expectations.
Best uses
- High quantity promotional caps for campaigns and giveaways.
- Bold, simple marks that benefit from flat color.
- Foam front trucker caps where embroidery would be too heavy or distortion prone.
Comparison summary
- Compared to embroidery, screen printing is flatter and can be cheaper at scale, but often feels less premium.
- Compared to transfers, screen printing can be more breathable and integrated, but may be less precise for tiny detail on curved panels.
9) Heat transfer methods (DTF transfers, screen print transfers, vinyl, and reflective films)
Heat transfer branding applies a pre printed or pre cut design onto the cap using heat and pressure. There are multiple transfer types, including DTF transfers for full color detail, screen print transfers for solid colors, and cut vinyl for simple shapes. Reflective and specialty films can add performance and nighttime visibility aesthetics.
Why it works
- High detail and full color: great for gradients, small text, and complex art.
- Fast iteration: artwork changes are often easier than re digitizing embroidery or creating new molds.
- Special effects: metallic, reflective, glow, and holographic looks are possible.
- Placement flexibility: transfers can work on areas where direct printing is hard, depending on press access and cap structure.
Watch outs
- Heat sensitivity: some cap materials, especially certain synthetics, foams, and coated fabrics, can warp or discolor if pressed incorrectly.
- Hand feel: transfers can feel like a thin film on the surface. Premium transfers minimize this, but it is still different from thread.
- Long term wear: durability depends on transfer quality, adhesive, and care. Edges can lift if applied poorly.
- Curvature issues: getting even pressure on a curved cap panel requires the right platen or cap press.
Best uses
- Promotional campaigns needing photographic or highly detailed logos.
- Retail micro drops where you want color complexity without heavy embroidery cost.
- Performance branding, such as reflective marks on running caps.
Comparison summary
- Compared to embroidery, transfers win on detail and gradients, but usually lose on timeless premium feel.
- Compared to screen printing, transfers can deliver more complex artwork consistently, especially on small batches, but add a film layer that some customers dislike.
10) Sublimation and all over panel printing (where suitable)
Sublimation uses heat to turn dye into gas that bonds with polyester fibers. The result is vibrant, permanent color that does not sit on top of the fabric. On caps, sublimation is typically used on polyester front panels, 5 panel styles, or cut and sew components before assembly. “All over” printed effects can also be achieved with cut and sew printed panels and then constructing the cap.
Why it works
- Unlimited color: photos, gradients, and complex art are possible without extra color charges.
- No heavy hand feel: because the dye bonds into the fiber, the surface remains smooth.
- Great for patterns: camo, florals, maps, and seasonal prints become the product identity.
Watch outs
- Material limits: sublimation works best on polyester and light colors. It is not ideal for dark cotton caps.
- Color matching: accurate brand colors require profiling and testing, especially for critical corporate Pantone matches.
- Construction complexity: to get true all over placement, printing before sewing may be required, which impacts lead time and minimums.
Best uses
- Event merch where bright graphics are the main selling point.
- Sports and outdoor promotions using lightweight polyester caps.
- Retail brands creating statement prints or seasonal art caps.
Comparison summary
- Compared to transfers, sublimation has a more integrated feel with excellent wash resistance, but only works on suitable fabrics and colors.
- Compared to embroidery, it offers far more color complexity, but not the same premium stitched texture.
How to compare embroidery, patches, and prints across the methods
Choosing among these top 10 methods becomes easier when you compare them on the factors that affect customer satisfaction and production risk. Use the points below as a scoring guide when you talk with your supplier or evaluate samples.
1) Detail and small text performance
- Best: woven patches, DTF transfers, sublimation.
- Good: screen printing with proper setup, flat embroidery with simplified art.
- Challenging: 3D puff embroidery, chenille, molded PVC for tiny text.
2) Premium look and perceived value
- Best: flat embroidery, 3D puff embroidery, leather patches, well made woven patches on retail silhouettes.
- Good: PVC patches for technical styles, embroidered patches for heritage styles.
- Depends on execution: printing and transfers can look premium when perfectly applied, but cheap prints read as promotional.
3) Durability and long term wear
- Best: flat embroidery, woven patches stitched on, high quality PVC patches, well cured screen prints.
- Good: leather patches with correct finishing, sublimation on appropriate polyester.
- Variable: heat transfers vary widely by film and adhesive quality, and by care instructions.
4) Comfort and inside finish
- Most comfortable on the face area: prints and sublimation usually add the least bulk.
- Comfort depends on backing: embroidery can be comfortable if backed cleanly and paired with a good sweatband.
- Patches add thickness: choose patch size and placement carefully for low profile caps that sit close to the forehead.
5) Lead time and sampling speed
- Fastest iteration: transfers and some digital print workflows, because artwork changes do not require new stitch programs or molds.
- Moderate: flat embroidery once digitized, woven patches once approved.
- Longer: PVC patches that require tooling, and cut and sew all over printed caps requiring panel production.
6) Minimum order quantity and setup costs
- Lower setup, flexible quantities: many transfer methods, depending on supplier.
- Digitizing costs: embroidery often needs a one time digitizing step, then scales well.
- Tooling costs: PVC patches may require molds, which favors larger runs or repeat programs.
7) Placement options on a cap
- Front center: embroidery, 3D puff, patches, and printing all work. Consider seam placement and curvature.
- Side panels: small embroidery and small woven patches are common. Transfers can work if pressing access is good.
- Back above closure: embroidery is the default. Small transfers can work but may lift if the area flexes heavily.
- Underbrim: screen printing and transfers are common. Embroidery is possible but can feel heavy.
8) Color matching and brand standards
- Thread matching: embroidery uses thread charts. It is reliable, but exact corporate matches sometimes require special threads.
- Ink matching: screen printing can be mixed to Pantone targets, but cap fabric and curing impact appearance.
- Digital color: transfers and sublimation depend on profiles and material base color. Always request a physical strike off sample when color is critical.
Design tips to get better results, regardless of method
Many problems blamed on a branding method are actually artwork or placement issues. These tips help you get a clean result with any of the top 10 options.
- Simplify fine lines: thicken strokes and open up small negative spaces when using embroidery, puff, PVC, and chenille.
- Limit tiny text: if you must include small text, consider a woven patch or high resolution transfer.
- Choose the right cap structure: structured fronts support embroidery and patches better, while unstructured caps suit minimal logos and softer treatments.
- Mind the seam: front center logos on 6 panel caps often intersect a seam. Move the design slightly or use a patch to avoid distortion.
- Ask for placement photos on a real cap: a flat proof is not enough. Curvature changes how designs read.
- Request durability guidance: ask how the decoration behaves under sweat, rain, and friction, and whether care instructions should be included.
Example selection scenarios
These common scenarios show how to choose a method quickly by prioritizing outcomes.
Scenario A, corporate gifts for an annual conference
- Goal: premium, uniform look, long wear.
- Best picks: flat embroidery for the front logo, small back embroidery for date or tagline.
- Alternate: woven patch if the logo includes small text or a detailed emblem.
Scenario B, retail drop with bold streetwear energy
- Goal: loud brand statement and shelf impact.
- Best picks: 3D puff embroidery or a bold PVC patch, plus small side embroidery.
- Alternate: chenille patch for varsity storytelling.
Scenario C, highly detailed artwork, gradients, or a photo
- Goal: keep every detail, avoid simplification.
- Best picks: DTF transfers or sublimation on suitable panels.
- Alternate: woven patch if you want a badge feel and crisp lines, but not full photo realism.
Scenario D, outdoors brand that wants understated premium
- Goal: minimal branding, lifestyle feel.
- Best picks: leather patch, debossed or engraved, stitched to the front.
- Alternate: tonal flat embroidery for a clean, stitched look with zero patch layer.
Quality checks to run before mass production
Whatever method you choose, these checks prevent the most common failures in cap branding projects.
- Confirm the cap material and structure first: do not approve decoration before you finalize the cap body. A method that works on thick twill may fail on thin nylon.
- Approve a physical pre production sample: photos are helpful, but feel and curvature matter.
- Check alignment: measure logo distance from brim and center line. Ask for tolerance ranges.
- Inspect edges and borders: on patches, confirm clean stitching, consistent border width, and no loose threads.
- Check inside finishing: embroidery backing, patch stitching, and transfer edges should not irritate the forehead.
- Test abrasion: rub the logo area with fabric or a soft brush. Poorly cured ink or weak transfer edges will reveal themselves quickly.
- Check color in real light: evaluate under daylight and indoor lighting, especially for navy, black, and dark green caps where perceived color shifts.
Frequently asked questions buyers ask when comparing these methods
Is embroidery always the most premium option?
Embroidery is the most universally recognized premium cap decoration, but premium also comes from execution. A well designed woven patch or a clean leather patch can feel even more retail appropriate for certain brands.
Do patches make caps uncomfortable?
Not necessarily. Comfort depends on patch size, placement, cap profile, and how the patch is stitched. Large stiff patches on low profile caps can feel bulky, while moderate sized patches on structured fronts are usually comfortable.
Are printed logos lower quality?
Not inherently. High quality screen printing and professional grade transfers can be durable and sharp. The risk is higher variability across suppliers, and low cost print shortcuts show quickly on caps.
Which method is best for small text?
Woven patches and detailed transfers are the most reliable for small text. Embroidery can work if the text is large enough and the font is chosen carefully.
Conclusion, choosing the best of the top 10 cap branding methods
The right cap decoration method is the one that matches your brand signal and your production reality. If you want timeless premium and durability, flat embroidery is the safe anchor. If you need bold retail attitude, 3D puff or molded patches deliver immediate impact. If your artwork demands fine detail, woven patches and modern transfers preserve clarity. If your story is understated and lifestyle driven, leather patches make the cap feel like a product, not a giveaway. And if color complexity is the whole point, sublimation and all over printing unlock creative range on the right materials.
When you brief a supplier, provide the logo, the desired cap style, target quantity, and where the cap will be used, corporate gifting, retail resale, staff uniform, or event giveaway. Then choose from these ten methods based on detail, durability, comfort, and lead time. That approach consistently produces caps that people keep wearing, which is the real measure of branding success.